Hello lovely people and welcome to computer repairs blog 🙂
Without a doubt one of the most talked about irritating ‘thingies’ with Windows Vista is the constant pop ups of the UAC prompts. This is especially annoying when you need to run a particular tool that requires it to be run in Administrator mode. Thankfully, today we can share with you a simple hack that you can utilise to create an administrator mode shortcut that does not prompt for the UAC. This is the topic of today’s installment of our computer repairs blog.
This should also work quite well for those running Windows 7
It works by setting up a scheduled task to run the application in Admin mode and then sets up a separate shortcut that tells the scheduled task to run. While all that might sound difficult it really is not, just follow our step by step instructions below.
Please note however – as you are required to click through a UAC prompt to set up the scheduled task it’s not a security loophole.
How to create the Scheduled Task Item
First open up *Task Scheduler* through the start menu search box (usually you can just type task), and then on the right-hand side click the “Create Task” link:

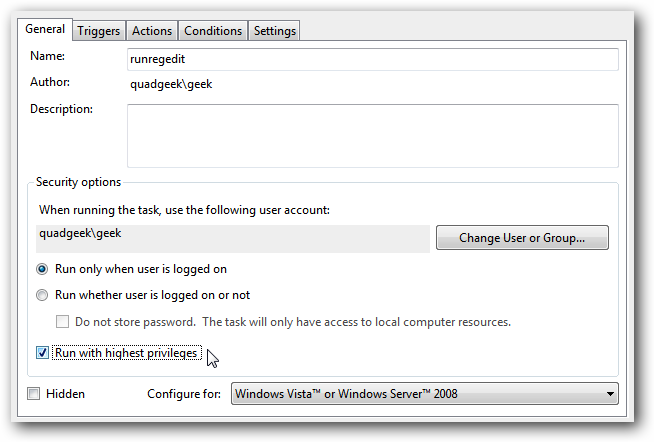
You now need to give the task a short simple name, preferably with no spaces in it. Then check the box for “Run with highest privileges” (this is very important)

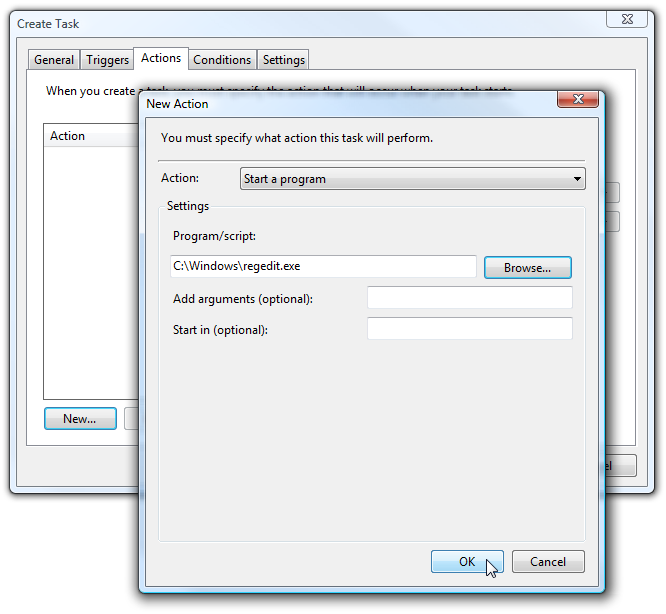
Switch to the *Actions* tab, and click the *New* button, then browse down to the application that you are trying to start.

Close out of the dialogs by clicking the OK button, this should create the new task in the list. You can right-click on it and choose *Run* if you want to at this point, this is simply to make sure that it launches the application the way you were expecting.

Now your scheduled tasks setup is done, so you can close out of that if you want… Just be sure you have remembered the name that you used for the task.
How to create the Shortcut to *Start the Task*
On the desktop right-click anywhere and choose New Shortcut from the menu.

This is where the real magic happens… we need to add a command that will run the scheduled task, passing in the name of the task that we used. As you can see, we used runregedit as the name for the task.
 Make sure you enter the task name like this, replacing the capitalised letters for the name of your task. (It’s not case sensitive)
schtasks /run /tn “TASKNAMEINQUOTES”
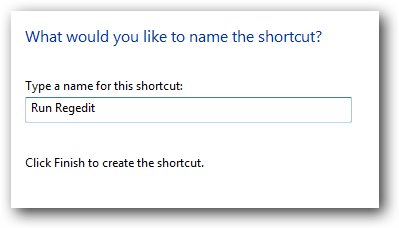
Now give your shortcut a useful/easy to remember name, and then click next to create it.

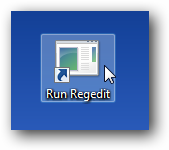
You should now have a shortcut that will launch the application in administrator mode.

But we can tweak it a bit more if you want … open up the properties for the shortcut, and then change the Run drop-down to “Minimised” (to hide the schtasks command line utility), and then click on Change Icon.
![]()
The easiest thing to do is just browse down to the application that you are opening with the shortcut… and you should see the icons for the application itself.
Now you have an application that both launches an application in Admin Mode – with no prompts at all – and – it looks good too! Enjoy this tip from your computer repairs geeks.
Over and out
MobileGeekette (computer repairs and more)


